
SOURDOUGH FOR DUMMIES
I said I would do a “sourdough for dummies” series so here it is! 😛 This isn’t really for “dummies”- this is just honestly what I needed!
First off- I am NOT any type of expert here. I want to make that VERY clear. If you’re looking for in-depth tips this isn’t the place. I just listened to a beginner sourdough podcast a month ago before I started and I was SO lost even though it was a basic episode and so I know some of you are lost too so I wanted to share my experience so far because I was afraid to get started.
Okay here we go!
To start, I want to include WHY sourdough bread is even a thing. Per usual, Lily Nichols has done a great job outlining some benefits in this article. You can do a basic internet search by yourself but I wanted to include this specifically because she covers the basics on gluten content, glycemic index, etc…
So to start (pun intended 🤪) you need to have a starter. A starter is just a combination of flour and water that has fermented. I didn’t start my starter from scratch. I bought some dehydrated starter from @thealwaysbusymom. Kathleen is one of my insta-friends and she sells it! It’s under $20 and it comes with a lot so you can share with a friend or have extra in case you need it. I will link her post here so you can follow her & order. She has several highlights and always answers questions as well so def give her a follow! This is how I started so it’s all I know. If you’re not going to start with a dehydrated starter and you’re going to do it all on your own- you’re on your own! Lol I’m just no help there as that’s not the route I took.
What do you need ?
A mason jar
A towel
A rubber band/hair tie
A knife/fork for stirring
A bread loaf pan and or a dutch oven type pot (I use my Xtrema pot)
All pretty basic stuff 😀
I listened to a podcast that talked about all the stuff you need to make sourdough and they truly said so many words I didn’t know. You don’t really NEED all of that! I thought I was going to have to buy a bunch of stuff but that’s not the case. I did buy a food scale (a cheap $10 one) but honestly I haven’t used that either.
How to get your starter going-
So what you do is you take some of the dehydrated starter- I think it’s a tablespoon but she includes instructions and you put it in the bottom of a mason jar. Then you add equal parts water and flour. I use organic all purpose flour. The instructions I got were to add 40 grams of each. Then you stir it all together. It should be thick like pancake batter so if it’s runny- add more flour until it gets to that consistency. This is called "feeding" your starter.
Take a rubber band or hair tie and put it on the jar at the spot where the top of the starter is. You want to mark how high it is in the jar.
Cover with a dish towel and leave it!
24 hours later go check it. It should have doubled in size and puffed up essentially. If if hasn’t, re-feed it and try again.
It might take a few days or even longer for it to double/grow. I incorrectly did mine at first and added too much water so after 24 hours mine was just like straight liquid. Whoops! It still didn’t “kill” it though. I was able to just add more flour and then it rose just fine! Once you bake for a while the yeast is in the air so it usually double way faster- in a couple of hours or so. However if you’ve never done it before then it will take longer - 12-24 hours.
So this is going to be your starter that you always maintain. There are two ways to do this:
Keep it on the counter covered with a towel & feed it once a day.
Keep it in the fridge covered with a towel and feed it once a week.
Basically if you want to be more low maintenance then keep it in the fridge. I’ve done a combo of both depending on the week & how often I bake something. There are people who have starters that are hundreds of years old! Pretty neat!
It will rise at first but then it should stay pretty steady from what I understand. Like once you feed it (which means just adding flour & water and stirring to that pancake batter consistency) and it has "grown" then it should stay that way, meaning it only doubles right after a feed, if that makes sense?
So that covers the basics of how to get your starter going and how to maintain it.
The harder part (in my opinion) is figuring out the baking times. I’ve heard people say that sourdough isn’t really a “type” of bread but more of a process for making it. I don’t get caught up with the semantics but I get what that means.
To make regular bread you don’t necessarily have to wait, but with sourdough you typically make your dough and then let it sit anywhere from 12-24 hours, or more in some cases. That’s the tricky part- timing it right for when you want to bake.
You let it sit because that’s when the fermentation happens.
The main thing to remember is that after you bake something you need to feed your starter again so just add more flour and water after you take some of the starter out to re-feed it. It will then double again and you start the process over. You basically just replenish what you take. I don't really measure this anymore. I just take usually like 1/4-1/2 of a cup of flour and same with water and add. I don't do strict measurements- just whatever gets the consistency to work.
I have only made a few things but I’m going to post a few recipes & tidbits as I haven’t really followed them perfectly. This will give you a good idea on the process as a whole though. I am pasting pictures below so you can see as well!
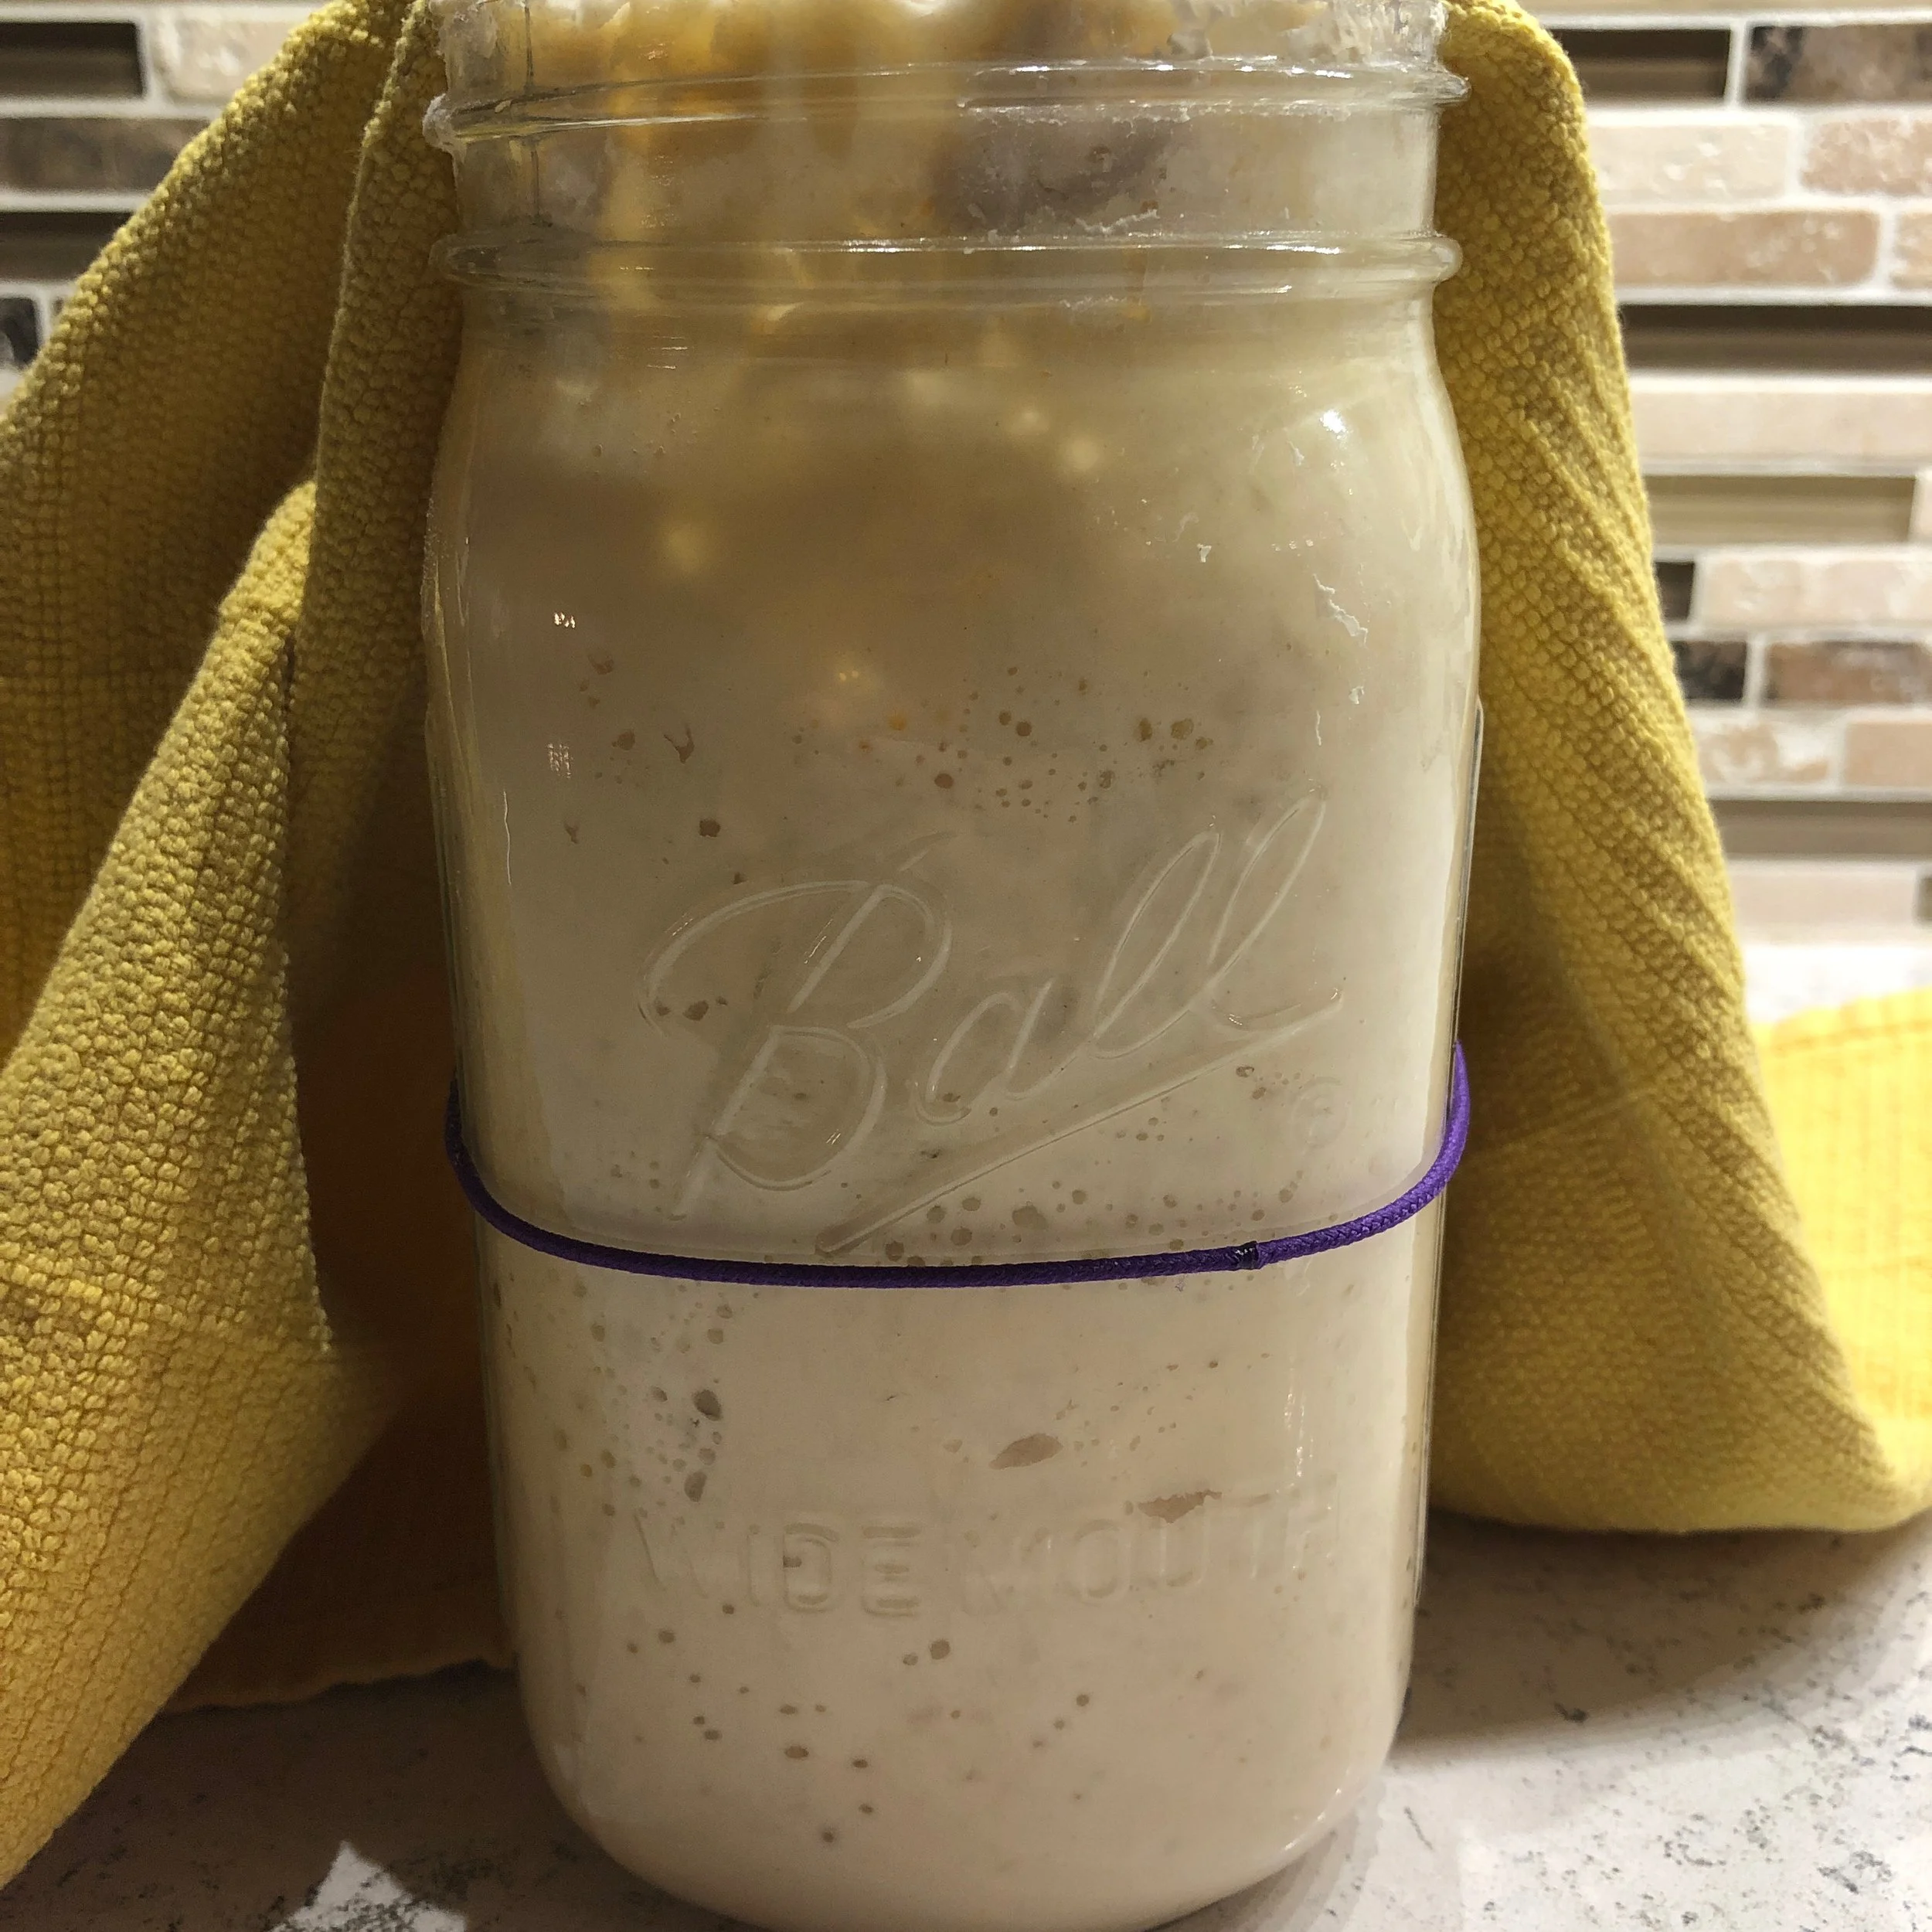
my very non-instagram worthy starter.

this is after I fed it and it rose overnight

& this is how it stays ha maybe I'll get a cute little towel one day... or maybe not
Regular Bread
Farm House on Boone Bread Recipe
The first thing I made was regular bread. I got this recipe from my friend on here & I made one in a loaf pan and one in my xtrema pot.
Here are some notes:
1. I used organic bread flour and NOT all purpose flour. AP flour is for feeding starter but for baking you use bread flour (unless you’re going to try to experiment with other flours).
2. I didn’t have 1/2 a cup of honey because my jar was almost gone so I just put what I had on hand and it still tasted fine.
I didn’t follow the instructions fully.
3. I combined all of the dough ingredients and just mixed it with my kitchenaid. I didn’t do any kneading. I combined it and then just covered and let it sit out overnight on the counter.
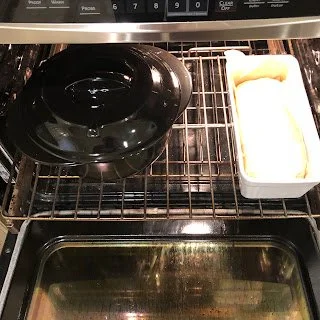
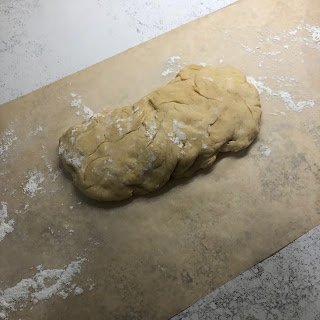
4. In the morning I took it and put some parchment paper on my island with some flour on it and cut the dough into two parts. I took the one for the loaf pan and formed it into more of a square and put it in that pan that was lined with parchment paper.
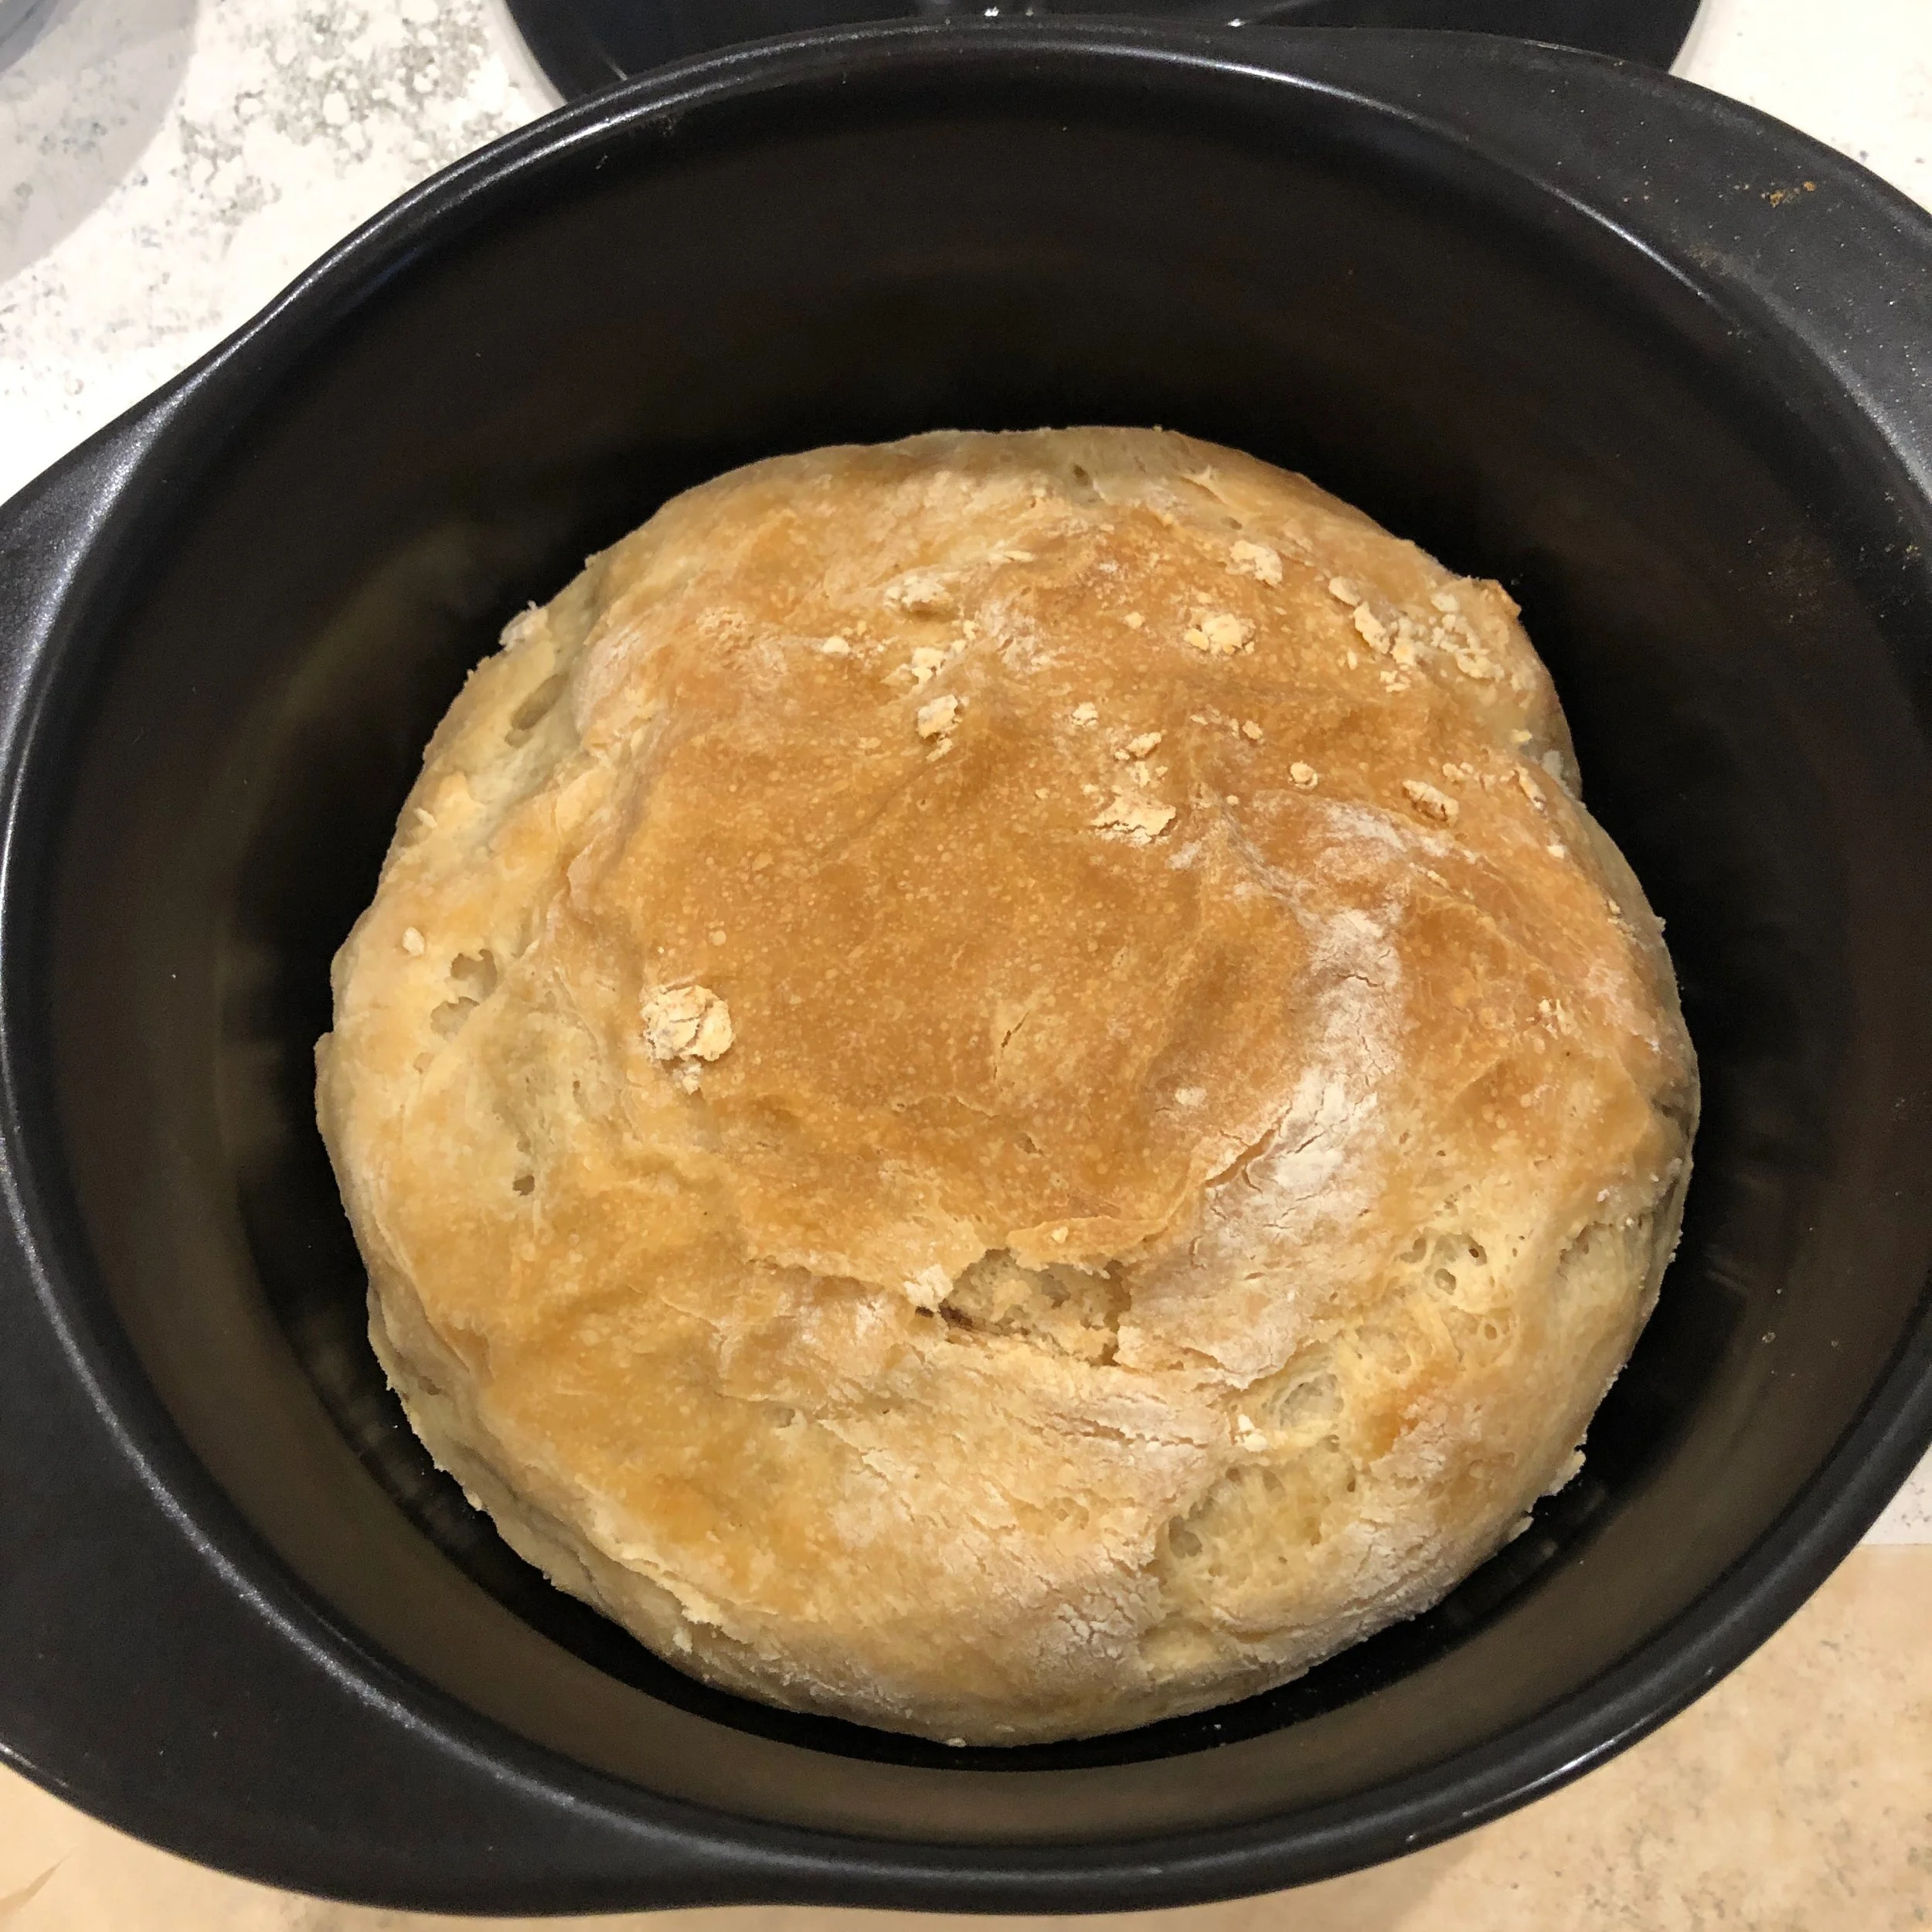
I took the other half and made it more of a circle and put it in my non-lined xtrema pot.
5. I then let them both sit for another 4 hours and baked per the instructions.
6. I baked the loaf pan without a lid/cover and I baked the xtrema pot one with a lid. I didn’t notice a difference in the two though so I don’t think that really mattered.
Both turned out super delicious! I like the idea of having it in loaf form because that’s just how I prefer the slices to be cut.

right after mixing
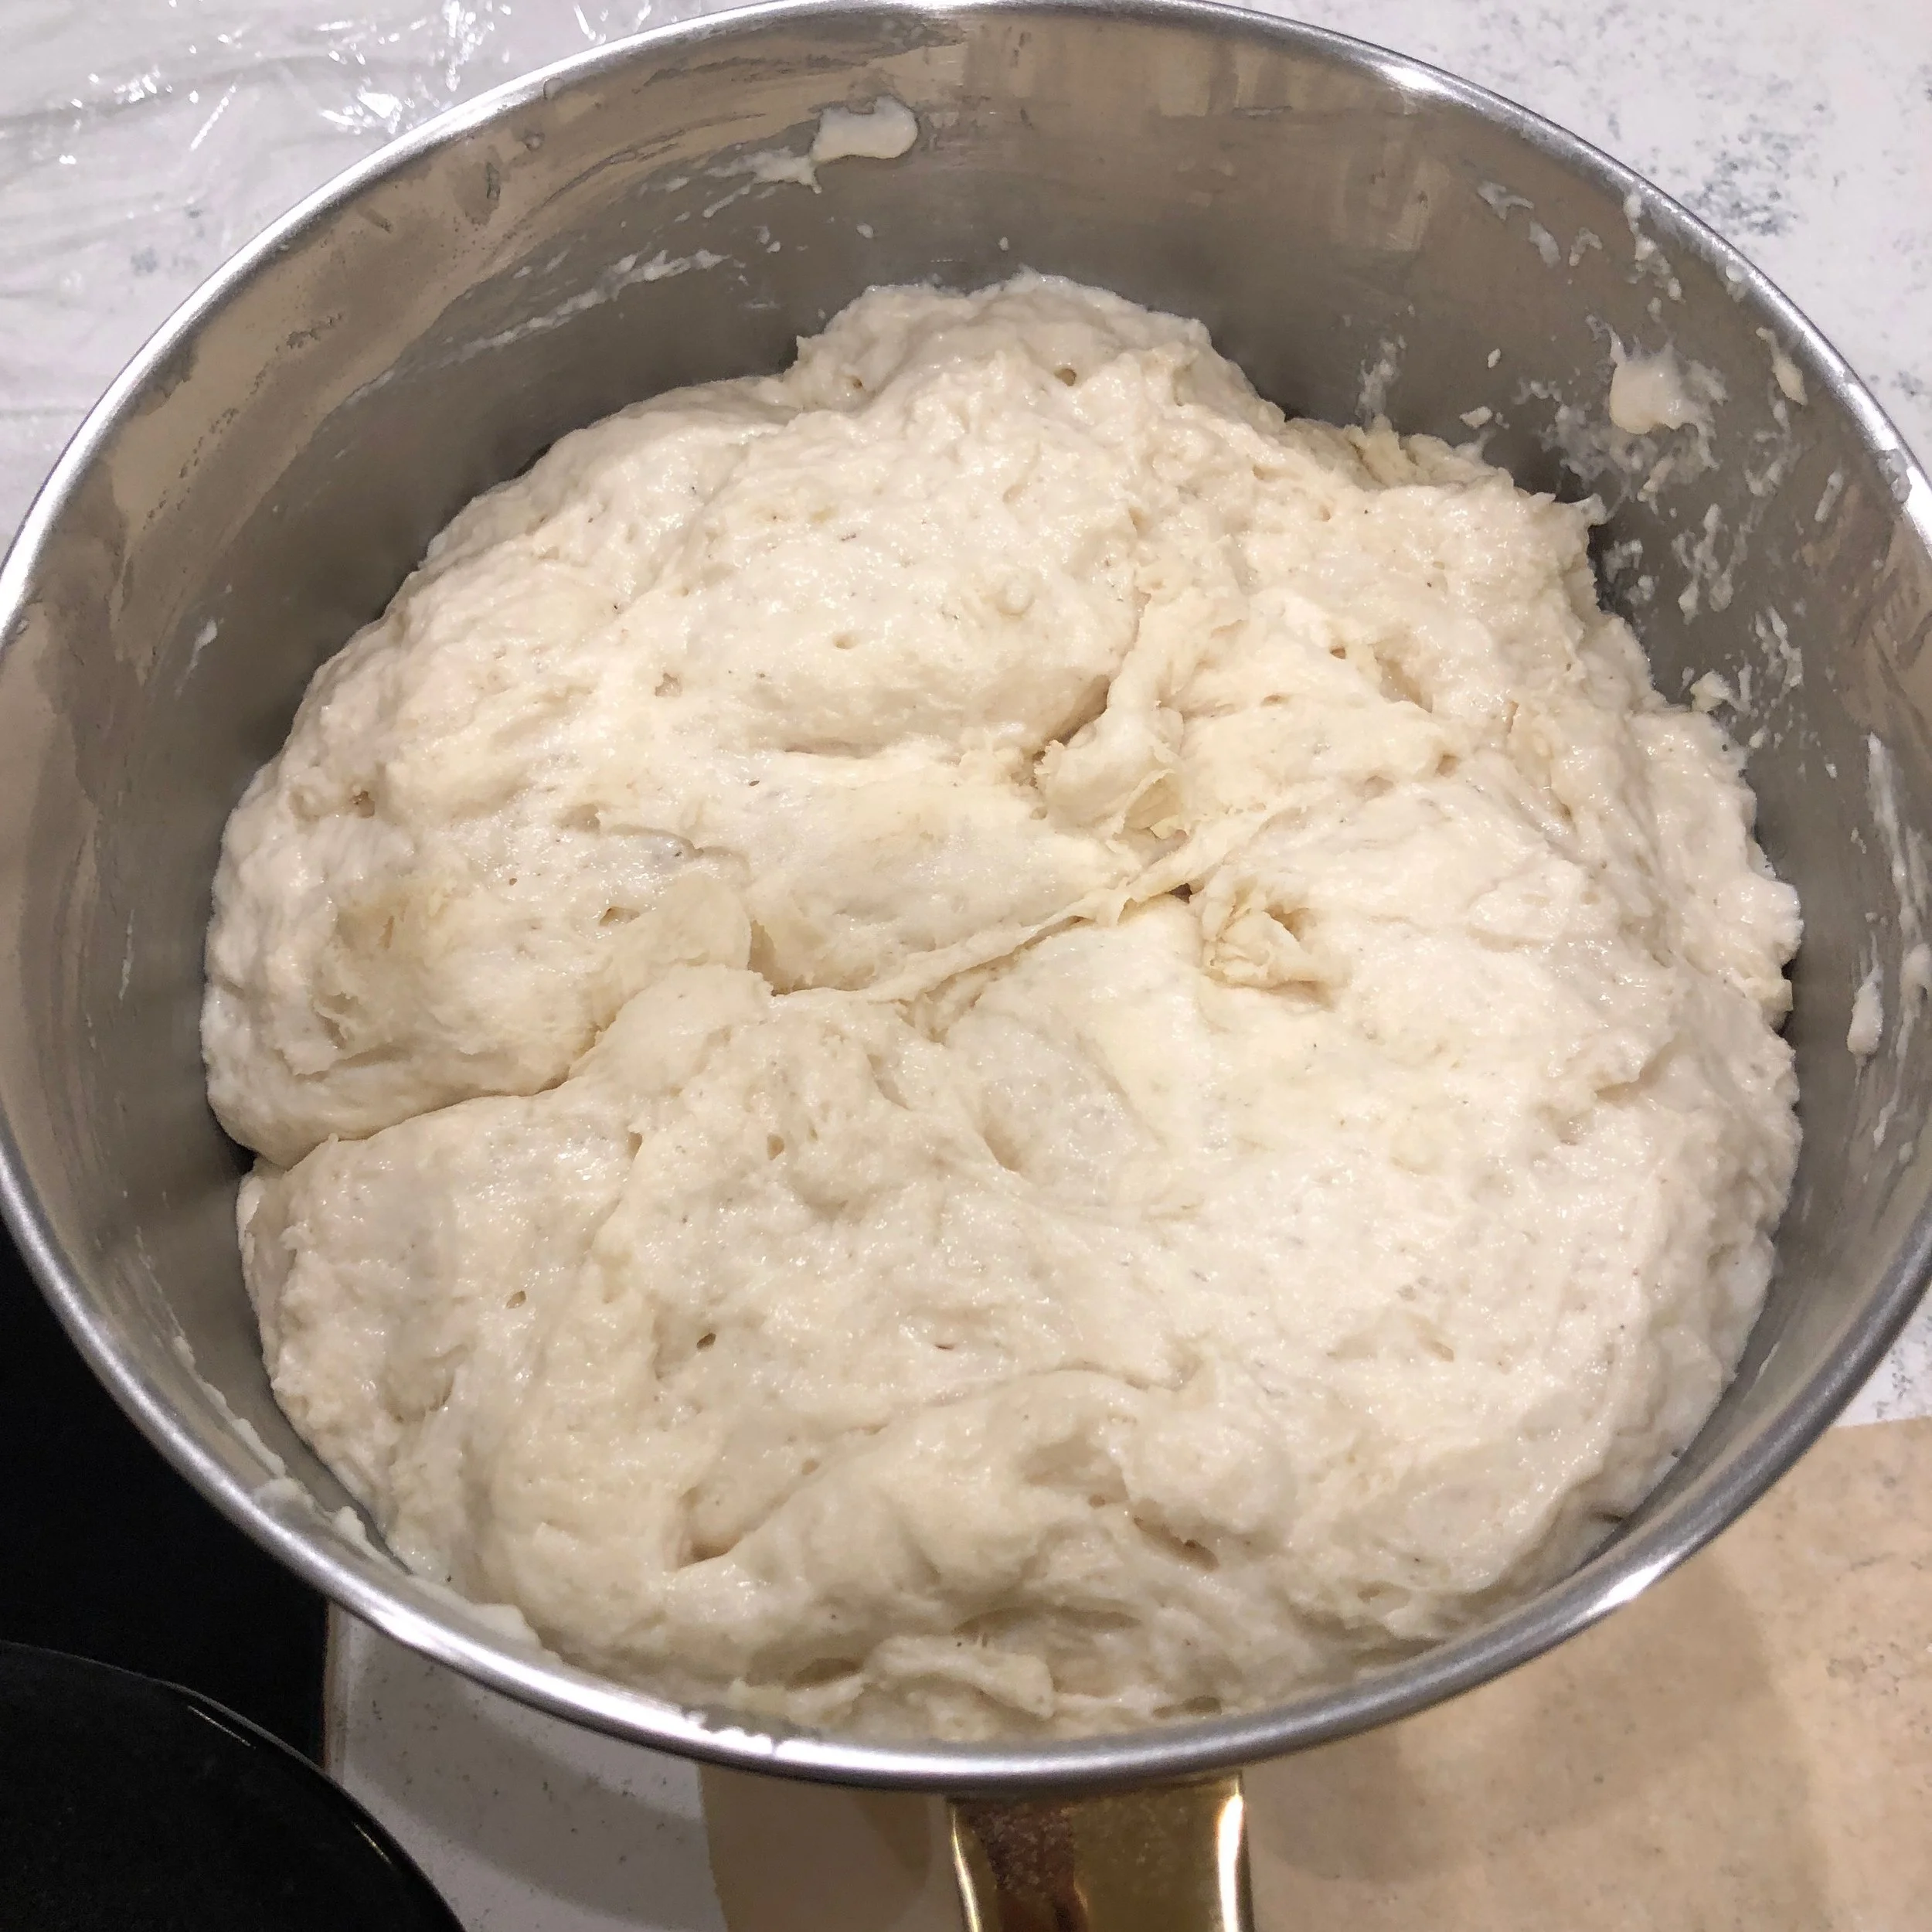
the next morning when it had doubled in size

pre-baking
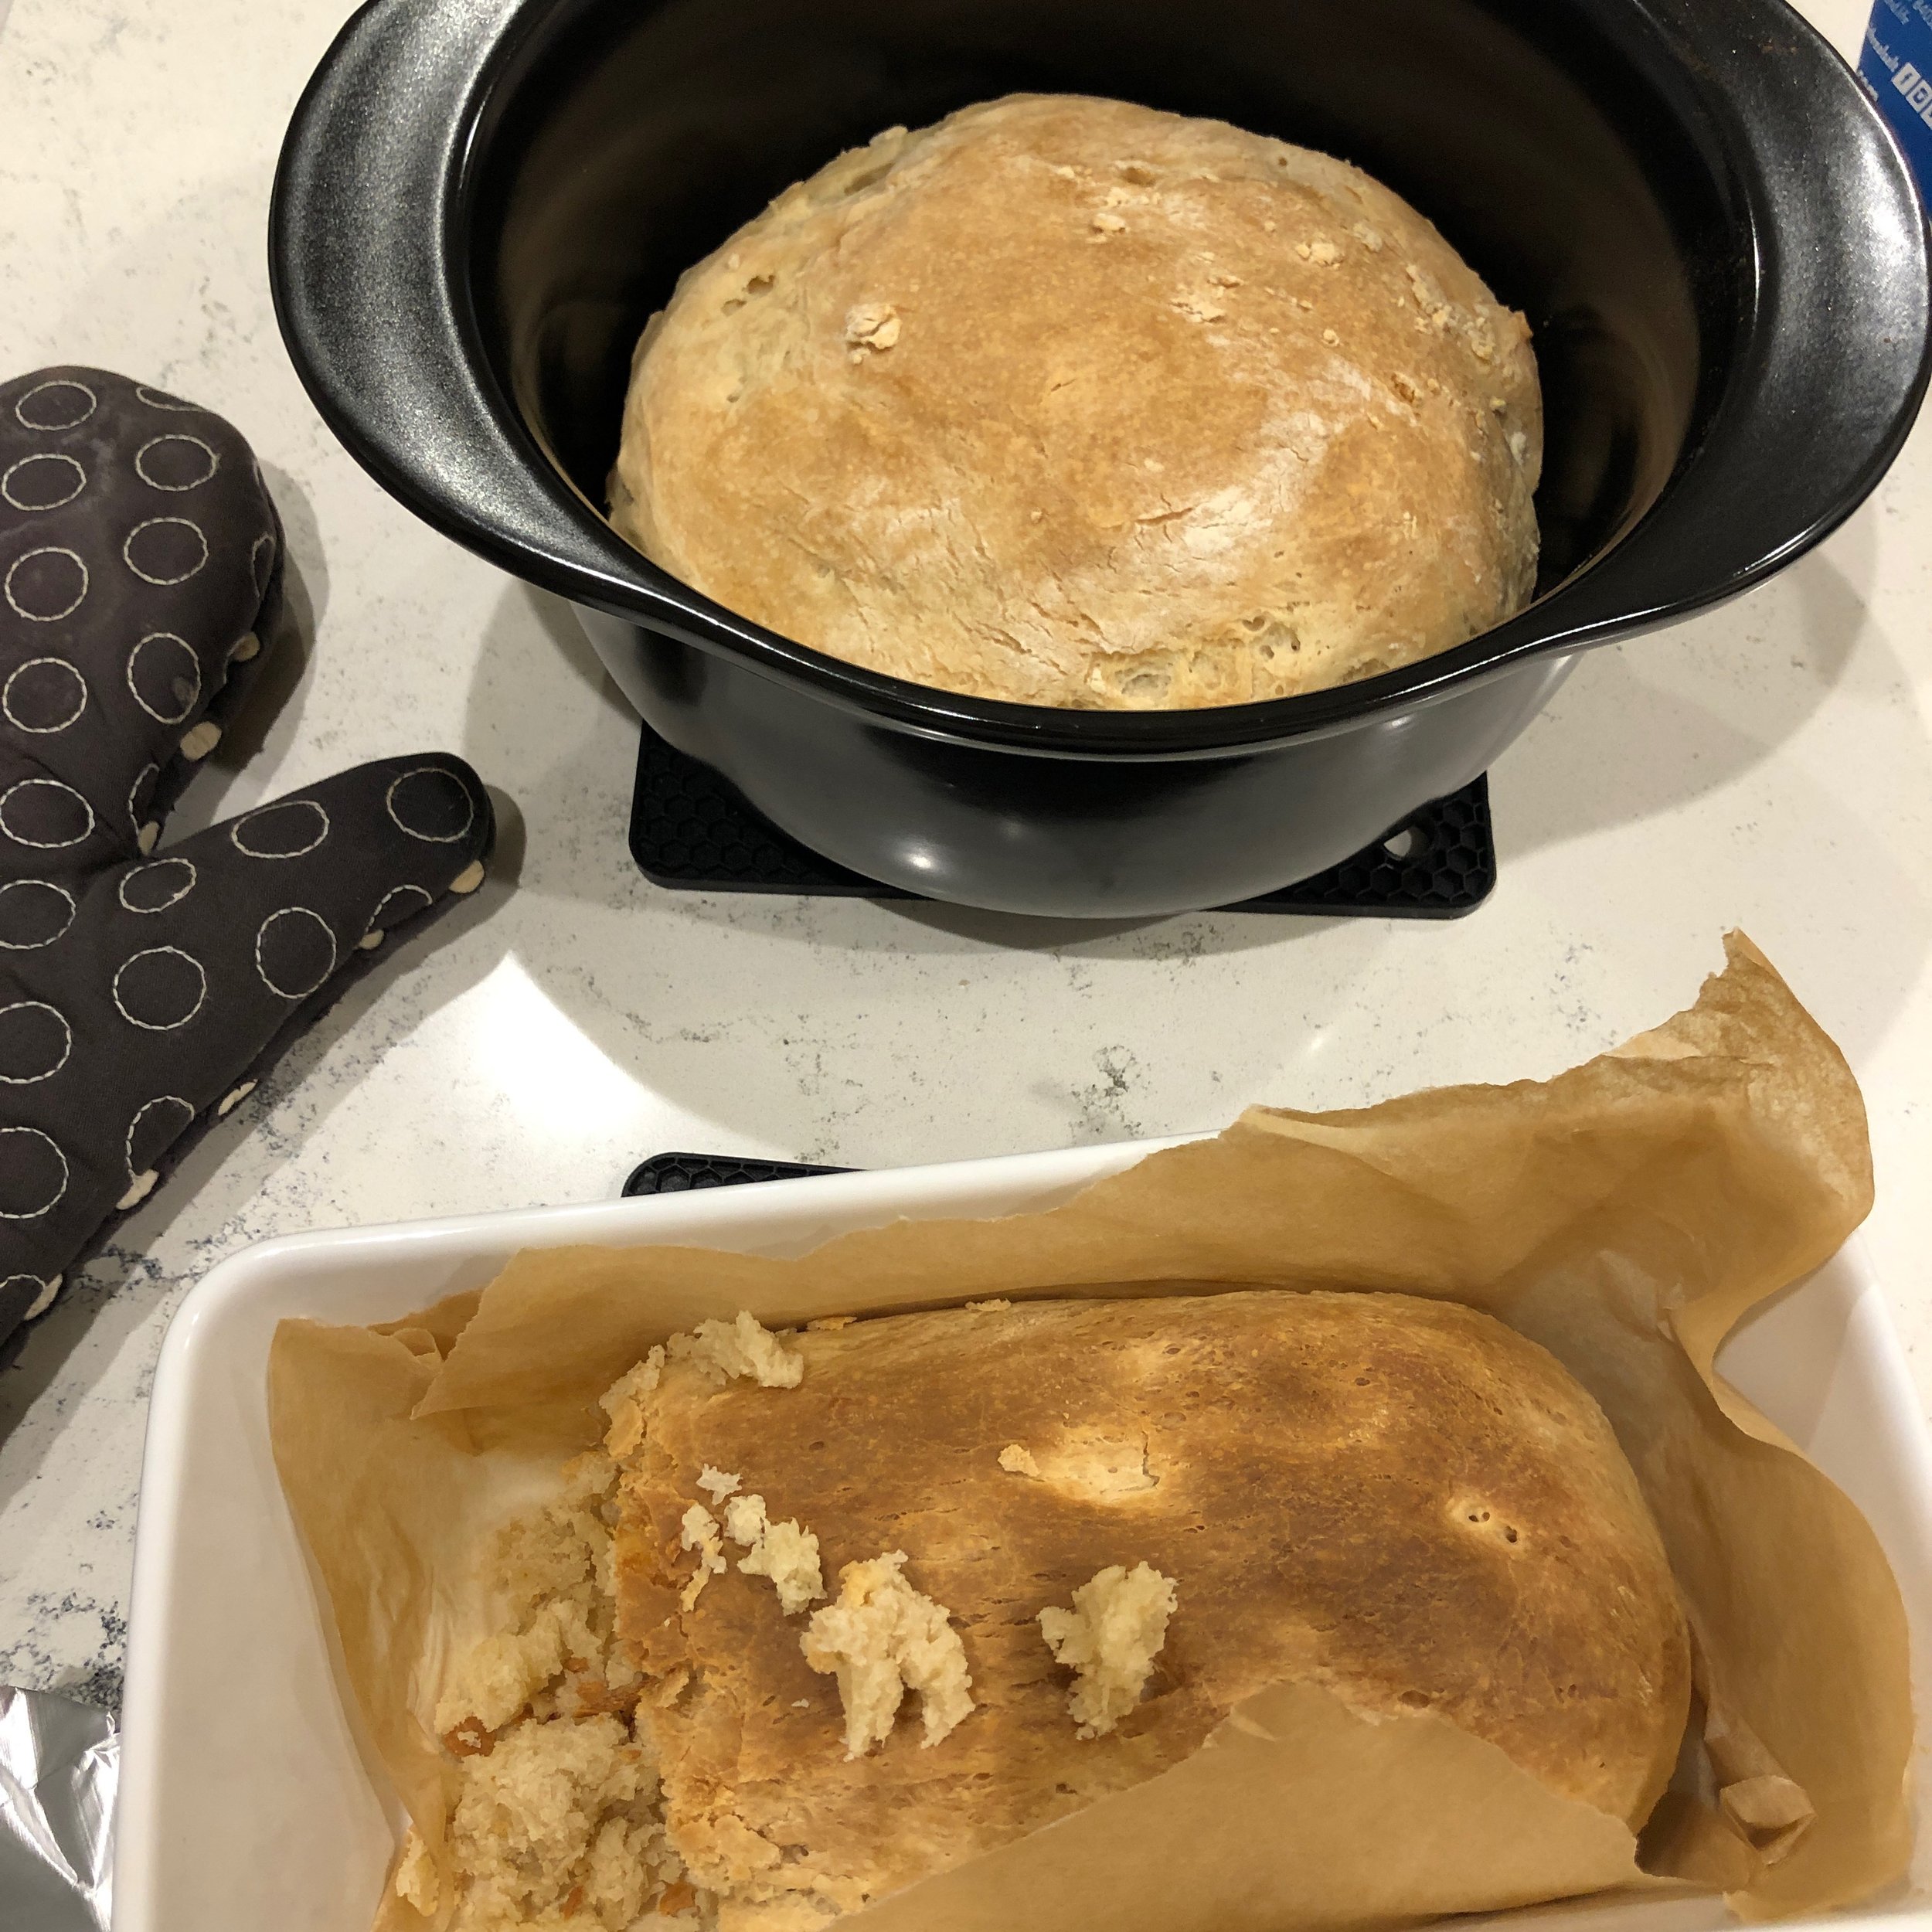
right out of the oven

again, not pretty! I had some extra flour from when I had formed it that I had put on the counter and it got a bit too much on there
I think this is a good recipe because you get two loaves for your time.
I should also note that I’m not concerned with my bread looking pretty. I think it’s pretty when others “score” theirs but I just honestly don’t care lol so keep that in mind that I’m not baking to make it look pretty!
Banana Muffins
Little Spoon Farm Banana Nut Muffins
I had some bananas that were going bad so I made these muffins next.
For this recipe I did use AP flour. I omitted the sugar. I find that when making banana muffins you really don’t need any added sugar because the bananas have enough on their own.
I also omitted the nuts just because I didn’t have any.
This was a pretty simple recipe!
I didn’t “age” my starter like the instructions said to but again— I’m kinda doing my own thing lol
These were really good with some kerrygold butter on top!
Blueberry Muffins
The Gingered Whisk Sourdough Blueberry Muffins
This is another easy recipe. Again, I omitted the sugar. I just think sugar is way overused in baking when it doesn’t need to be there.
Cinnamon Rolls
The Clever Carrot Sourdough Cinnamon Rolls
Y’all. These are maybe the MOST delicious things I have ever made! I am a BIG fan of cinnamon rolls. Cinnamon/sugar is my favorite combo so these are SO good to me. I did find that they took a bit longer so if you want to have them ready in the morning then do that option she mentions.
These also weren’t as sweet as yucky processed cinnamon rolls from the store. I didn’t feel bleh after eating them- making things at home makes a HUGE difference. I did use organic coconut sugar instead of regular cane sugar.
I mixed the dough in my kitchenaid and let it sit out overnight just in that same mixing bowl with butter.
The next morning it had doubled. I took it out and rolled it into a rectangle. I then made the cinnamon/sugar mix and I used the melted butter option. I put the filling on then rolled it into a log & then cut the rolls.
I transferred them to a pan and they were set to rise for 2 more hours. I got impatient after like 45ish minutes and just decided to bake them. Would they have risen more maybe after another hour? Perhaps- but I had measured and they didn’t rise at all in that first 45 minutes so I just figured what the heck I’m going to bake them!
I made the topping while they baked and drizzled it on when they were done.
These were SO good! Truly I will probably make them more often now that I know how easy they are.
I’ve always strayed away from making cinnamon rolls because I didn’t really know how to use yeast and all of that but making them this way makes it so easy!

right after mixing
the next morning after rolling

flattened out with lots of cinnamon and coconut sugar!

all rolled up

pre-baking when they were supposed to rise for two hours
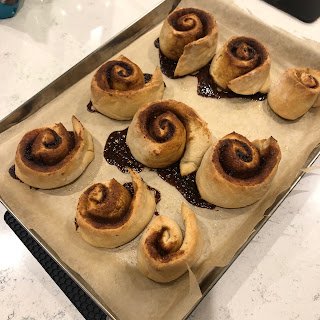
right out of the oven

post- drizzle

not the prettiest but man these were GOOD- tiny Payson hand sneaking a bite 😉
So that’s all I’ve made so far but so far everything has turned out yummy despite me kinda of straying from directions! I hope this has been a helpful little guide! Again, I truly am a beginner but once you get started it’s actually very simple. You don’t need to buy all of the fancy gadgets if you don’t want to.
For more advanced information I highly recommend Homegrown_Education's FREE sourdough guide. Go to her Instagram bio to get it! She also did a podcast episode linked here. This is the episode I mentioned above that was a bit confusing lol but it had good info!
Let me know if you have any questions! Feel free to shoot me a message over @thetoxinfreetexan on Instagram. I'm happy to help share what I've learned.